There comes a time in any yogi’s practice when we’re ready to accept a new challenge. Whether it’s bending ourselves into new shapes, going upside-down, sideways, backward or forward in space, the thrill of stepping outside of our comfort zones and exploring the unknown is what keeps us coming back for more. But sometimes these new poses can be scary. Sometimes they feel impossible. And many times we may refer to certain poses as our nemesis (Lizard Pose, I’m looking at you).
Fortunately the nature of yoga is adaptation. There is no one perfect pose for any body. And with a few tips and modifications, a block or two and a little extra cushion, more poses become accessible to us than we may have previously lead ourselves to believe.
Here are six modifications for a few tricky situations we might find ourselves in on our sticky mat.
L-Shaped Handstand
Rather than taking your Handstand hops directly to the wall only to potentially admit defeat, focus on building strength first with this L-shaped variation. Yes, you’ll use the wall, but the focus here is really on alignment: stacking the bones and stabilizing the core. Sit in Staff Pose (Dandasana) with your back against the wall and measure the spot on your mat where your heels line up. Then, flip around and place your palms directly on that spot and bring your heels slightly up the wall for a short Downward Dog. The balls of your feet should be firmly pressed into your mat with your inner arches stretched up the wall. Next, take one foot up the wall behind you and place it behind your butt, keeping your knee bent. Then, do the same with your other leg. Now straighten both legs and make sure your heels are in the same alignment as your hips in order to achieve this upside-down L-shape. Focus on engaging your core and keeping your shoulders stacked directly over your wrists with your gaze in-between your thumbs at the floor. Come down one foot at a time and rest in Child’s Pose. The next time you try a handstand, it should feel a whole lot easier after this!
Supported Warrior III
Warrior III is tricky because it takes achieving a balancing of the torso and lifted back leg, as if you were attempting to stabilize a seesaw. The key is to use your standing leg as a fulcrum that supports the “lever” of the body by squaring off the hips. By using two blocks placed under your hands (which are stacked directly underneath your shoulders), you can achieve this T-shape in your body more naturally. Depending on the length of your arms and standing leg, you should adjust the height of the block accordingly—whatever allows you the most space, freedom, and length. Eventually, you might remove the blocks and try just using your fingertips. Then, once you’ve achieved the core strength necessary to really keep yourself afloat, try bringing your palms to your heart. Repeat on the other side.
Revolving Half Moons
Like Revolved Triangle, Revolved Half Moon pose is a doozy. And like Warrior III, it can prove challenging to keep the back leg not only lifted, but also in an even plane that extends directly from the hip. By using blocks much like in Warrior III, you can use the extra support to ground through your fingertips to rotate your hip externally for Half Moon (Ardha Chandrasana) and internally for Revolved Half Moon (Parivrtta Ardha Chandrasana). Begin in Warrior III as described above—but you may want to slide your blocks forward and slightly wider if you’re super tight in your hips. With your right foot forward, inhale to lift your left hand toward the sky and externally rotate your left hip. Exhale to release the left hand down to the block, then inhale to reach your right hand to the sky as you internally rotate the left hip. The standing leg remains neutral. Repeat a few times, finding more opening in your chest as you go, then switch legs.
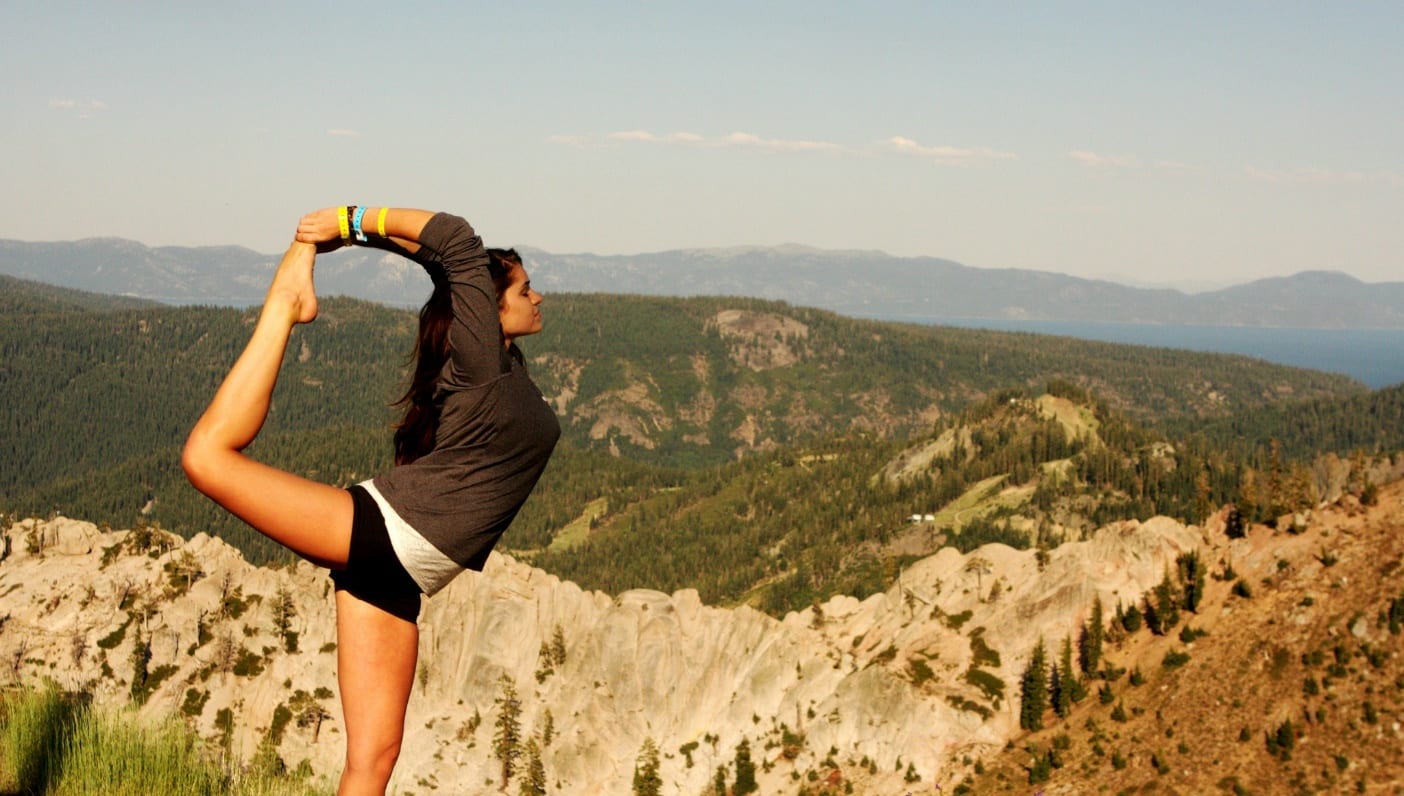
King Dancer with a Strap
Different from Dancer’s Pose (Natarajasana)—when we grab hold of our back foot or ankle—the challenge of King Dancer (pictured above) lies in grabbing the back foot with both hands overhead, which incorporates a massive opening through the chest and shoulders that puts the flexibility of the spine to the test. This is one pose you definitely don’t want to force, so a yoga strap is naturally your best friend. From Tadasana, bend one foot behind you and loop the center part of a strap over the top of that foot with whichever hand is on that same side of your body. Start leaning forward, then give yourself a lot of slack with the strap as you rotate your grip and begin to lift your elbow in front of you, then overhead. Begin to reach around with your opposite hand to grab hold of the strap overhead with both hands. You can inch the hands down the strap closer to your standing foot, but do so with patience. Keep leaning forward and using the tugging on the strap to create traction. Switch legs.
Eka Pada Pushups
This arm balance requires a strong Chaturanga. For this “pushup” variation, begin in Downward Facing Dog and lift one foot high as you inhale. On your exhale, draw that knee forward to the outside of the corresponding tricep, then lower yourself halfway down as you would in Chaturanga. Inhale to shoot the leg back to Down Dog Split and straighten your arms, exhale to repeat the exercise. Eventually, you might try sending your heart forward with your knee resting on the corresponding tricep, and maybe float the back foot. From there, you could straighten your bent knee by extending through your heel, entering the full expression of Eka Pada Koundinyasana II. But for now, stick with these pushups to build up strength on both sides of your body until you’re really ready to fly.
Beach Blanket Bakasana
Crow Pose (Bakasana) can be scary for many yogis, because the fear of falling forward flat on your face is real. A block, or even a blanket placed on your mat where you think your forehead might land is a great way to bridge the gap between fear and flight. But to really execute this challenging arm balance you’re going to need to (once again) build up that core strength. Grab another blanket that’s folded into fourths (think rectangular shape) and use hardwood floors for this exercise. (To reiterate, if you are afraid of falling, place additional padding where your face could potentially make contact with the earth.) Begin in a squat with your feet on your blanket and your palms stacked under your shoulders. Take a deep breath in, then exhale to shoot your legs straight back (the blanket will help your feet glide easily behind you), until you find yourself in a high plank position. Inhale to draw the legs back in, then exhale to shoot them back. Repeat for a few times to really feel the engagement of your core. Then, the next time your knees come back to a squat, wrap them outside of your triceps as you bend your elbows in like you would in Chaturanga. Start to lean your heart forward as you come to the balls of your feet and then tips of the toes—by now the blanket should be dragging away from you. And just maybe, when you’re good and ready, you’ll soar into the full pose.
—
 Andrea Rice is a Senior Writer for Wanderlust Media. She is also a freelance writer, editor, and yoga teacher. Her work has appeared in The New York Times, Yoga Journal, SONIMA, mindbodygreen, AstroStyle, and other online publications. You can find her regular classes at shambhala yoga & dance center in Brooklyn, and connect with her on Instagram, Twitter, and on her website.